Boards and circuits
You can work with the boards and circuits in your certificates from Pirform's Circuits and Test Results area.
Tip
The Circuits and Test Results area lets you focus on a single board at a time. But you can work on all your boards together by using Pirform's Board Manager.
Overview
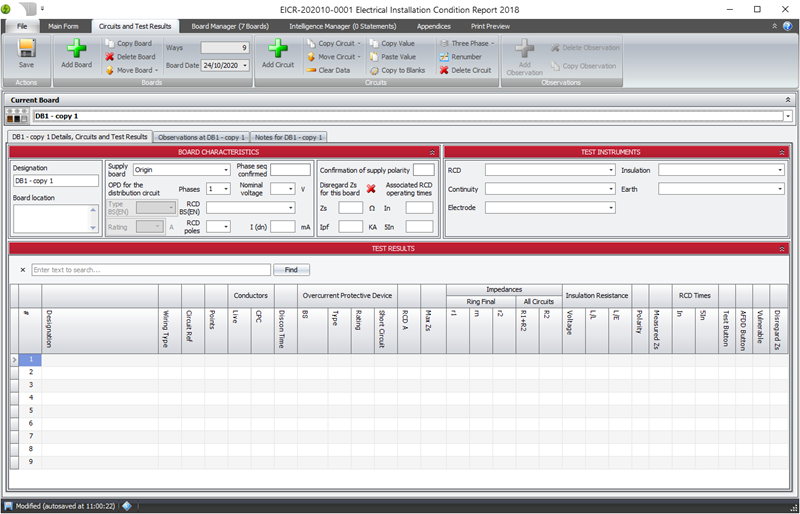
Use the ribbon to add, copy or remove boards and circuits, change the ordering, merge or unmerge three-phase circuit groups and adjust observations at the board.
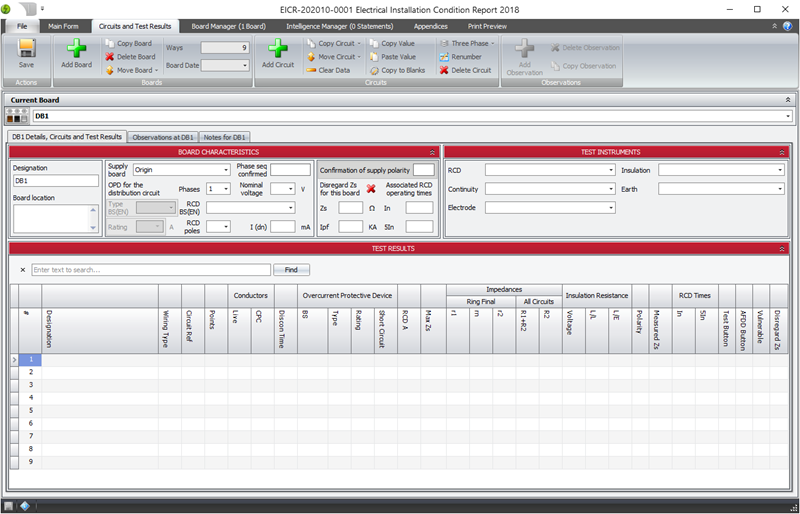
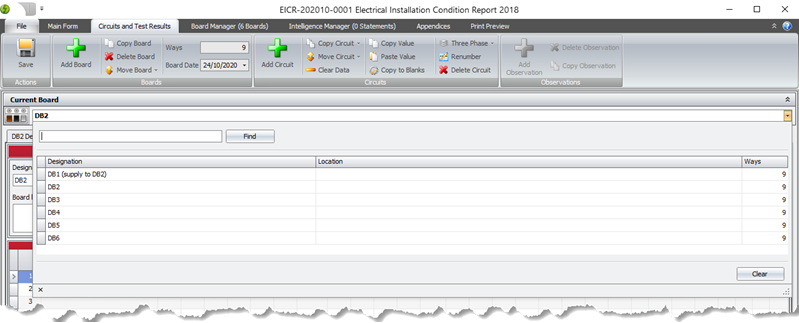
Select the board that you want to work with using the board selection control. The Find Box lets you search for the board you want to work with. You can also hold the Ctrl and Alt keys and and use the Up or Down arrows to move through your boards (read more about Pirform's keyboard shortcuts here).
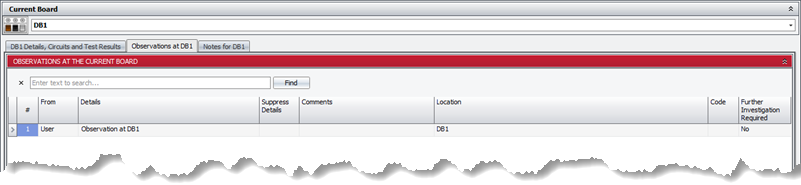
Observations at a board
Observations against the board are shown in the separate Observations tab.
Notes at a board
You can also enter notes against the board to record, for example, items required for later works. These do not appear on the certificate but can be viewed in the Board Manager and exported to Excel to work with outside of Pirform.

Copying boards and circuits
In the Circuits and Test Results section of the certificate, you will find features for copying boards and for circuits in the boards and circuits sections.

Note
You can copy boards to other certificates using the certificate merge feature.
Copying boards
Go to the board you want to copy and click Copy Board in the ribbon. After which you will be presented with the option to copy with the same supply, or with the supply as the origin.
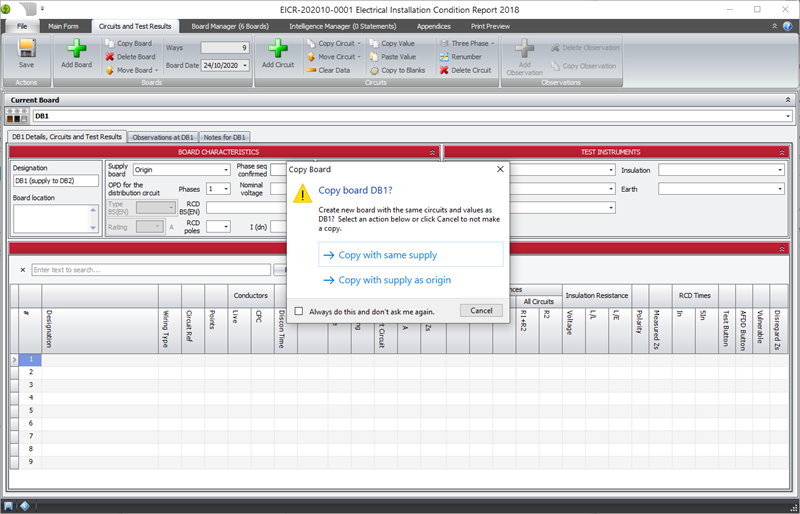
A new board will be created with "copy N" appended to the designation.
Copying circuits
Select the circuit you want to copy (the marker in the left most column has an arrow to show the selected circuit) and then choose one of the options under the Copy Circuit menu in the ribbon:
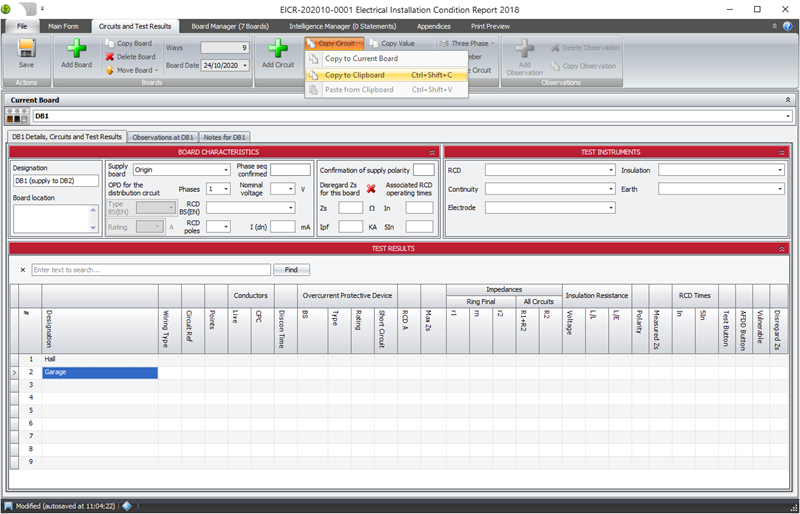
If you select Copy to Current Board then a new circuit with the same values as the selected circuit will be created in the current board.
If you select Copy to Clipboard then the selected circuit will be available for pasting into any board that you choose. You can paste the copied circuit as many times as you wish. You can see the circuit that is in the clipboard at the bottom of the screen.
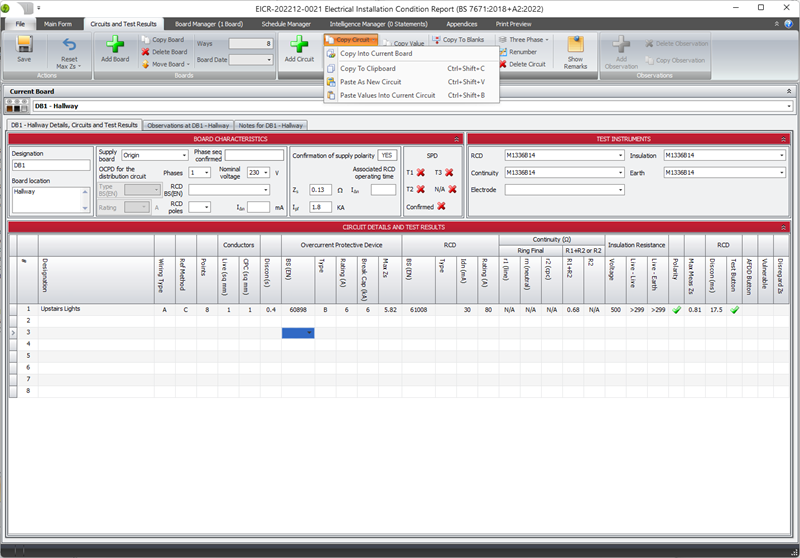
Once a circuit has been copied, the menu allows pasting the circuit both as a new circuit or as values into the currently selected circuit.
Tip
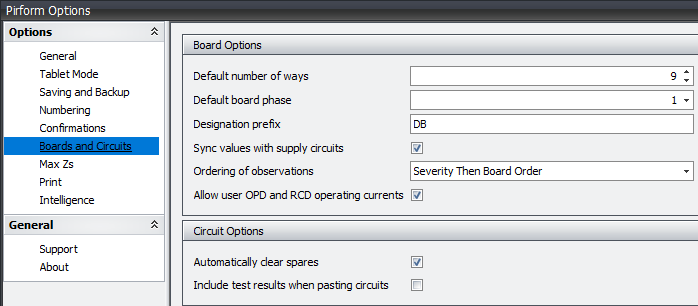
You can control whether Pirform pastes the test results as well as the circuit details from inside Pirform Options by ticking the option Include test results when pasting circuits:
Note
You can also use keyboard shortcuts to copy and paste circuits, as well as move a circuit's location in a board. See here for more.
Marking a circuit as a spare
You can mark a circuit as spare by entering "Spare" into the circuit designation. This will clear any values in that circuit and the circuit will be ingnored when copying values down from another circuit.
Tip
You can turn this feature off from inside Pirform Options by unticking the option Automatically clear spares:
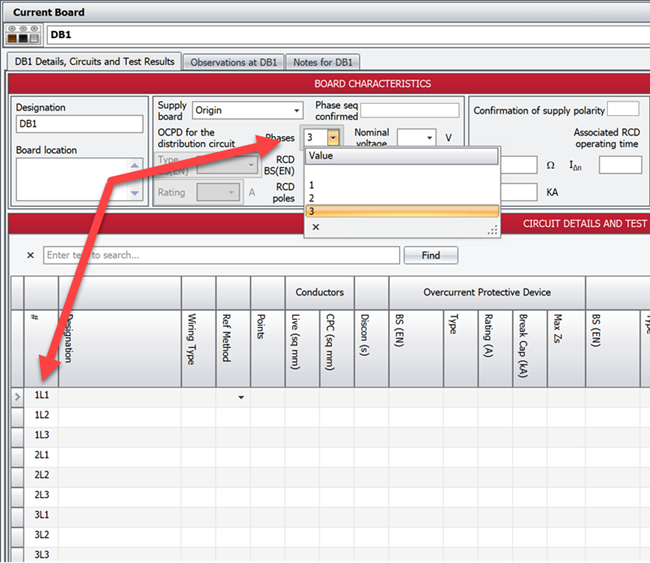
Changing the board phase
You can change the phase of the board by selecting the require phase in the board characteristics. Pirform will automatic adjust the numbering scheme when you change between single-phase and three-phase.
Note
If you change the board to three-phase then Pirform will add circuits in groups of three.
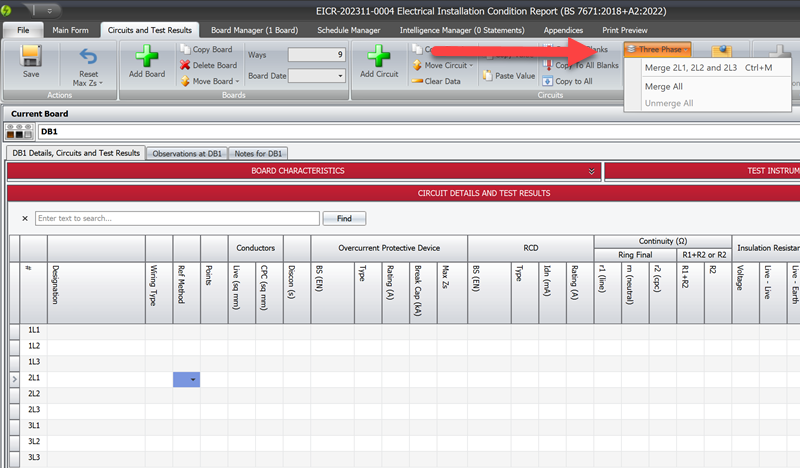
Merging three-phase circuits
You can merge or un-merge a circuit in a three-phase board by using the Three Phase menu item in the ribbon.
Tip
You can do many things, including merge and un-merge circuits, using Pirform's keyboard shortcuts.
Copying circuit values
Select a cell in the circuit grid and right click to show a menu that alows copying and pasting values. The functionality in the menu is also available from the ribbon.
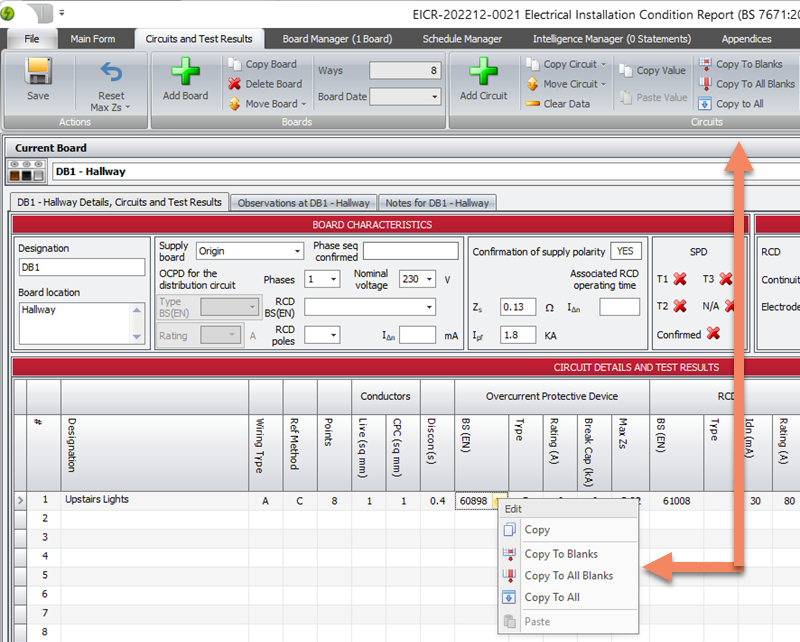
The following functionality is avaiable:
- Copy will copy the value in the current cell so that you can later use Paste to paste it into another cell.
- Copy To Blanks will copy the current cell value down stopping at the next cell that has a value.
- Copy To All Blanks will copy the current cell value to all blank cells in the same column.
- Copy To All will copy the current cell value to all cells in the same column (blanks and those that have values).
Note
Spare circuits are ignored when copying values from other cells.
Moving circuits
The Move Circuit item in the ribbon allows you to move the selected circuit up or down.
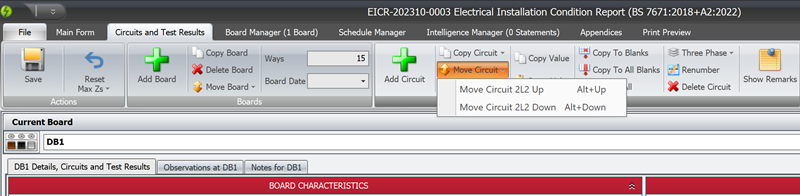
Moving circuits up or down in a single-phase board is straight forward and works as you would expect.
Moving circuits in a three-phase board works as follows:
- The circuit will move up or down until it becomes the first of last circuit in its group.
- If a circuit at the top or bottom of its group is moved, the whole circuit group is moved in the board.
Tip
The easiest way to to move circuits between groups is to change the board to single-phase, move your circuits as required, then change the board back to three-phase.
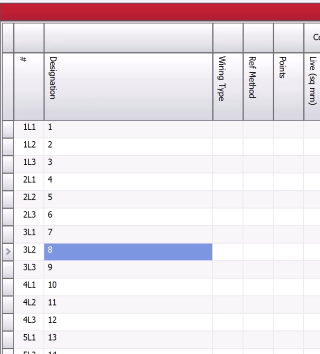
To show how that works, let's start off with a circuit in the middle of a three-phase group, 3L2:
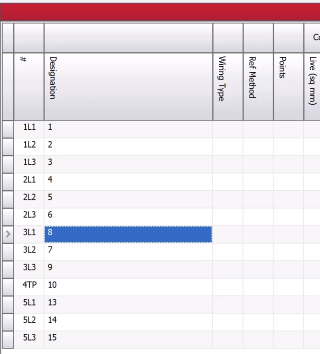
Moving it up takes it to the top of the group and Pirform renumbers the circuits to make the circuit we moved 3L1:
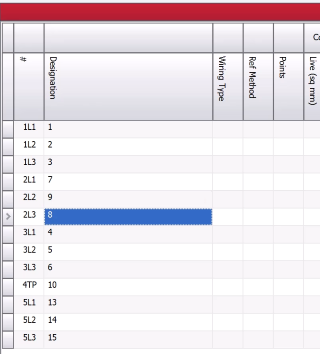
As it's at the top of the group, moving it up moves the whole of the 3L* group up above the previous groups. Pirform renumbers to swap the 2L* and 3L* numberings:

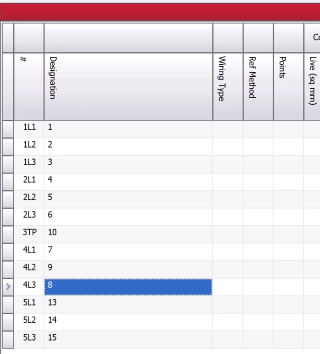
If we then move it back down twice it will then be at the bottom of its group:
After that, moving it down will move the whole group to be below the following group, renumbering again:

If we moving it down again will move it over the merged group 4TP below:
Resetting max Zs values
The Reset Max Zs button in the ribbon allows you to recalculate max Zs values. You can control whether manually entered max Zs values are reset during recalculation and you can choose whether to reset values for either the current board or all boards in the certificate.
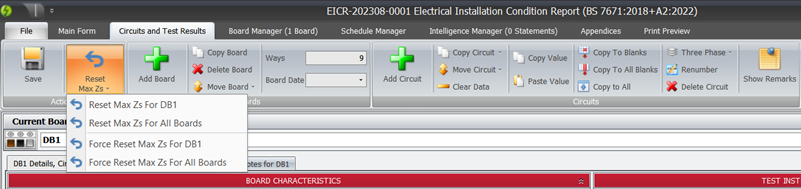
In this menu there are options to reset the values for circuits in the current board or in all boards.
Max Zs values that have been entered by the engineer and not calculated by Pirform can be reset by selecting the menu items that start with the word "force".
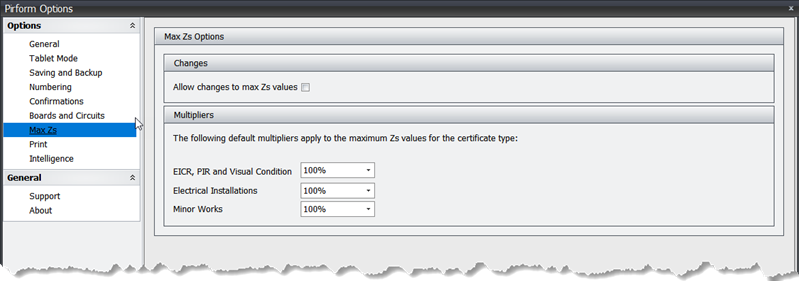
Entering max Zs values
You can set Pirform to allow entry of max Zs values by ticking the box Allow changes to max Zs values under the Max Zs section in Pirform Options.
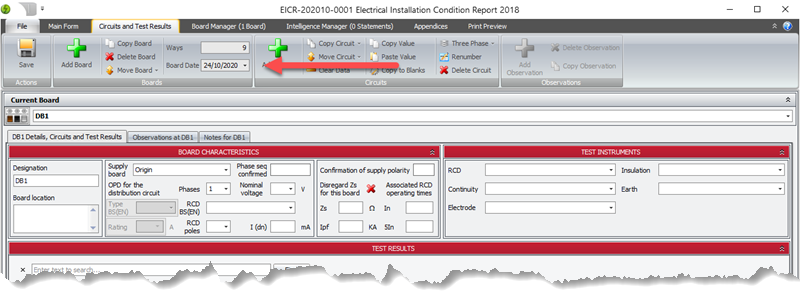
Using the board date
The board date is the date Pirform uses as the inspection date when you add a new boards. Keeping the board date separate from the main date of inspection because it is useful in scenarios such as when you are working on a rolling program of inspections for an installation and reporting in a single certificate.
The board date will be first set to the date of inspection when that is first set, but you can select any other date directly from the ribbon (the same is available in the Board Manager):
Updating the inspection date
When you are working on a rolling program of inspections you will often create new certificates by copying the previous certificate. When you set the new inspection date in that new copy, you don't always want to change the board inspection date for all boards in your new certificate.
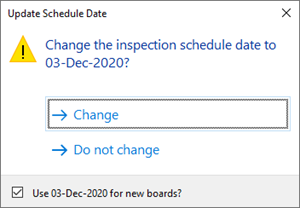
Pirform recognises this and asks whether you want to update the inspection dates for boards that match the previous date before making any changes. You can also optionally update the inspection schedule date and the board date for the certificate:
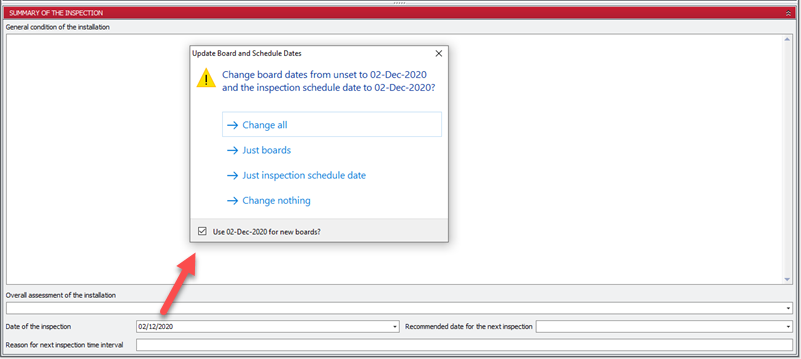
If there are boards matching the old inspection date then Pirform only asks if you want to update the inspection schedule date and the board date for the certificate:
Other wiring types
Tip
Read how to adjust the drop-down lists in Pirform here.
Pirform has the wiring types A-H pre-configured. If you need to use a different wiring type then you can enter it in in the Wiring Types in the Drop-down List Manager.
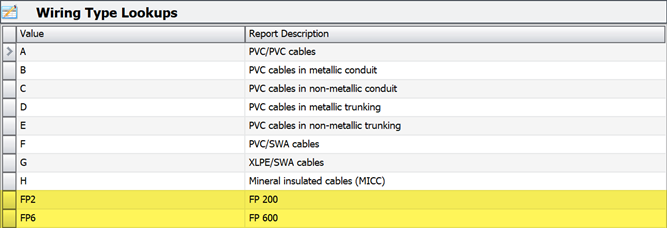
When you select these they will be shown in the PDF in the "Other" section for the relevant board.
